Annotations
Layer text, arrows, shapes, blur, spotlights, highlights, and key-combination overlays on top of your video. Each is independently timed, positioned, and styled.
Parent: video vs. canvas
The first control in the annotation inspector is Parent. It determines what the annotation is glued to:
- Video — the annotation belongs to the recorded screen. It moves with zoom regions and stays aligned with what’s on screen, and is clipped to the recording rect so it never bleeds onto the wallpaper or background area. This is the right choice for blurs over sensitive UI, arrows pointing at a button, spotlights highlighting an element — anything that “belongs” to a specific location in the recording.
- Canvas — the annotation belongs to the editor canvas. It stays put even when the recording zooms or pans, and can sit in the wallpaper margin around the recording. Use this for captions, watermarks, key-combination tutorials, and other chrome that shouldn’t move when the video does.
New annotations get a sensible default based on type: blurs, arrows, spotlights, highlights, rectangles, and circles default to Video; text, key combinations, and images default to Canvas. Toggle anytime — the visual position is preserved across the switch (the annotation doesn’t jump, only its behavior under future transforms changes).
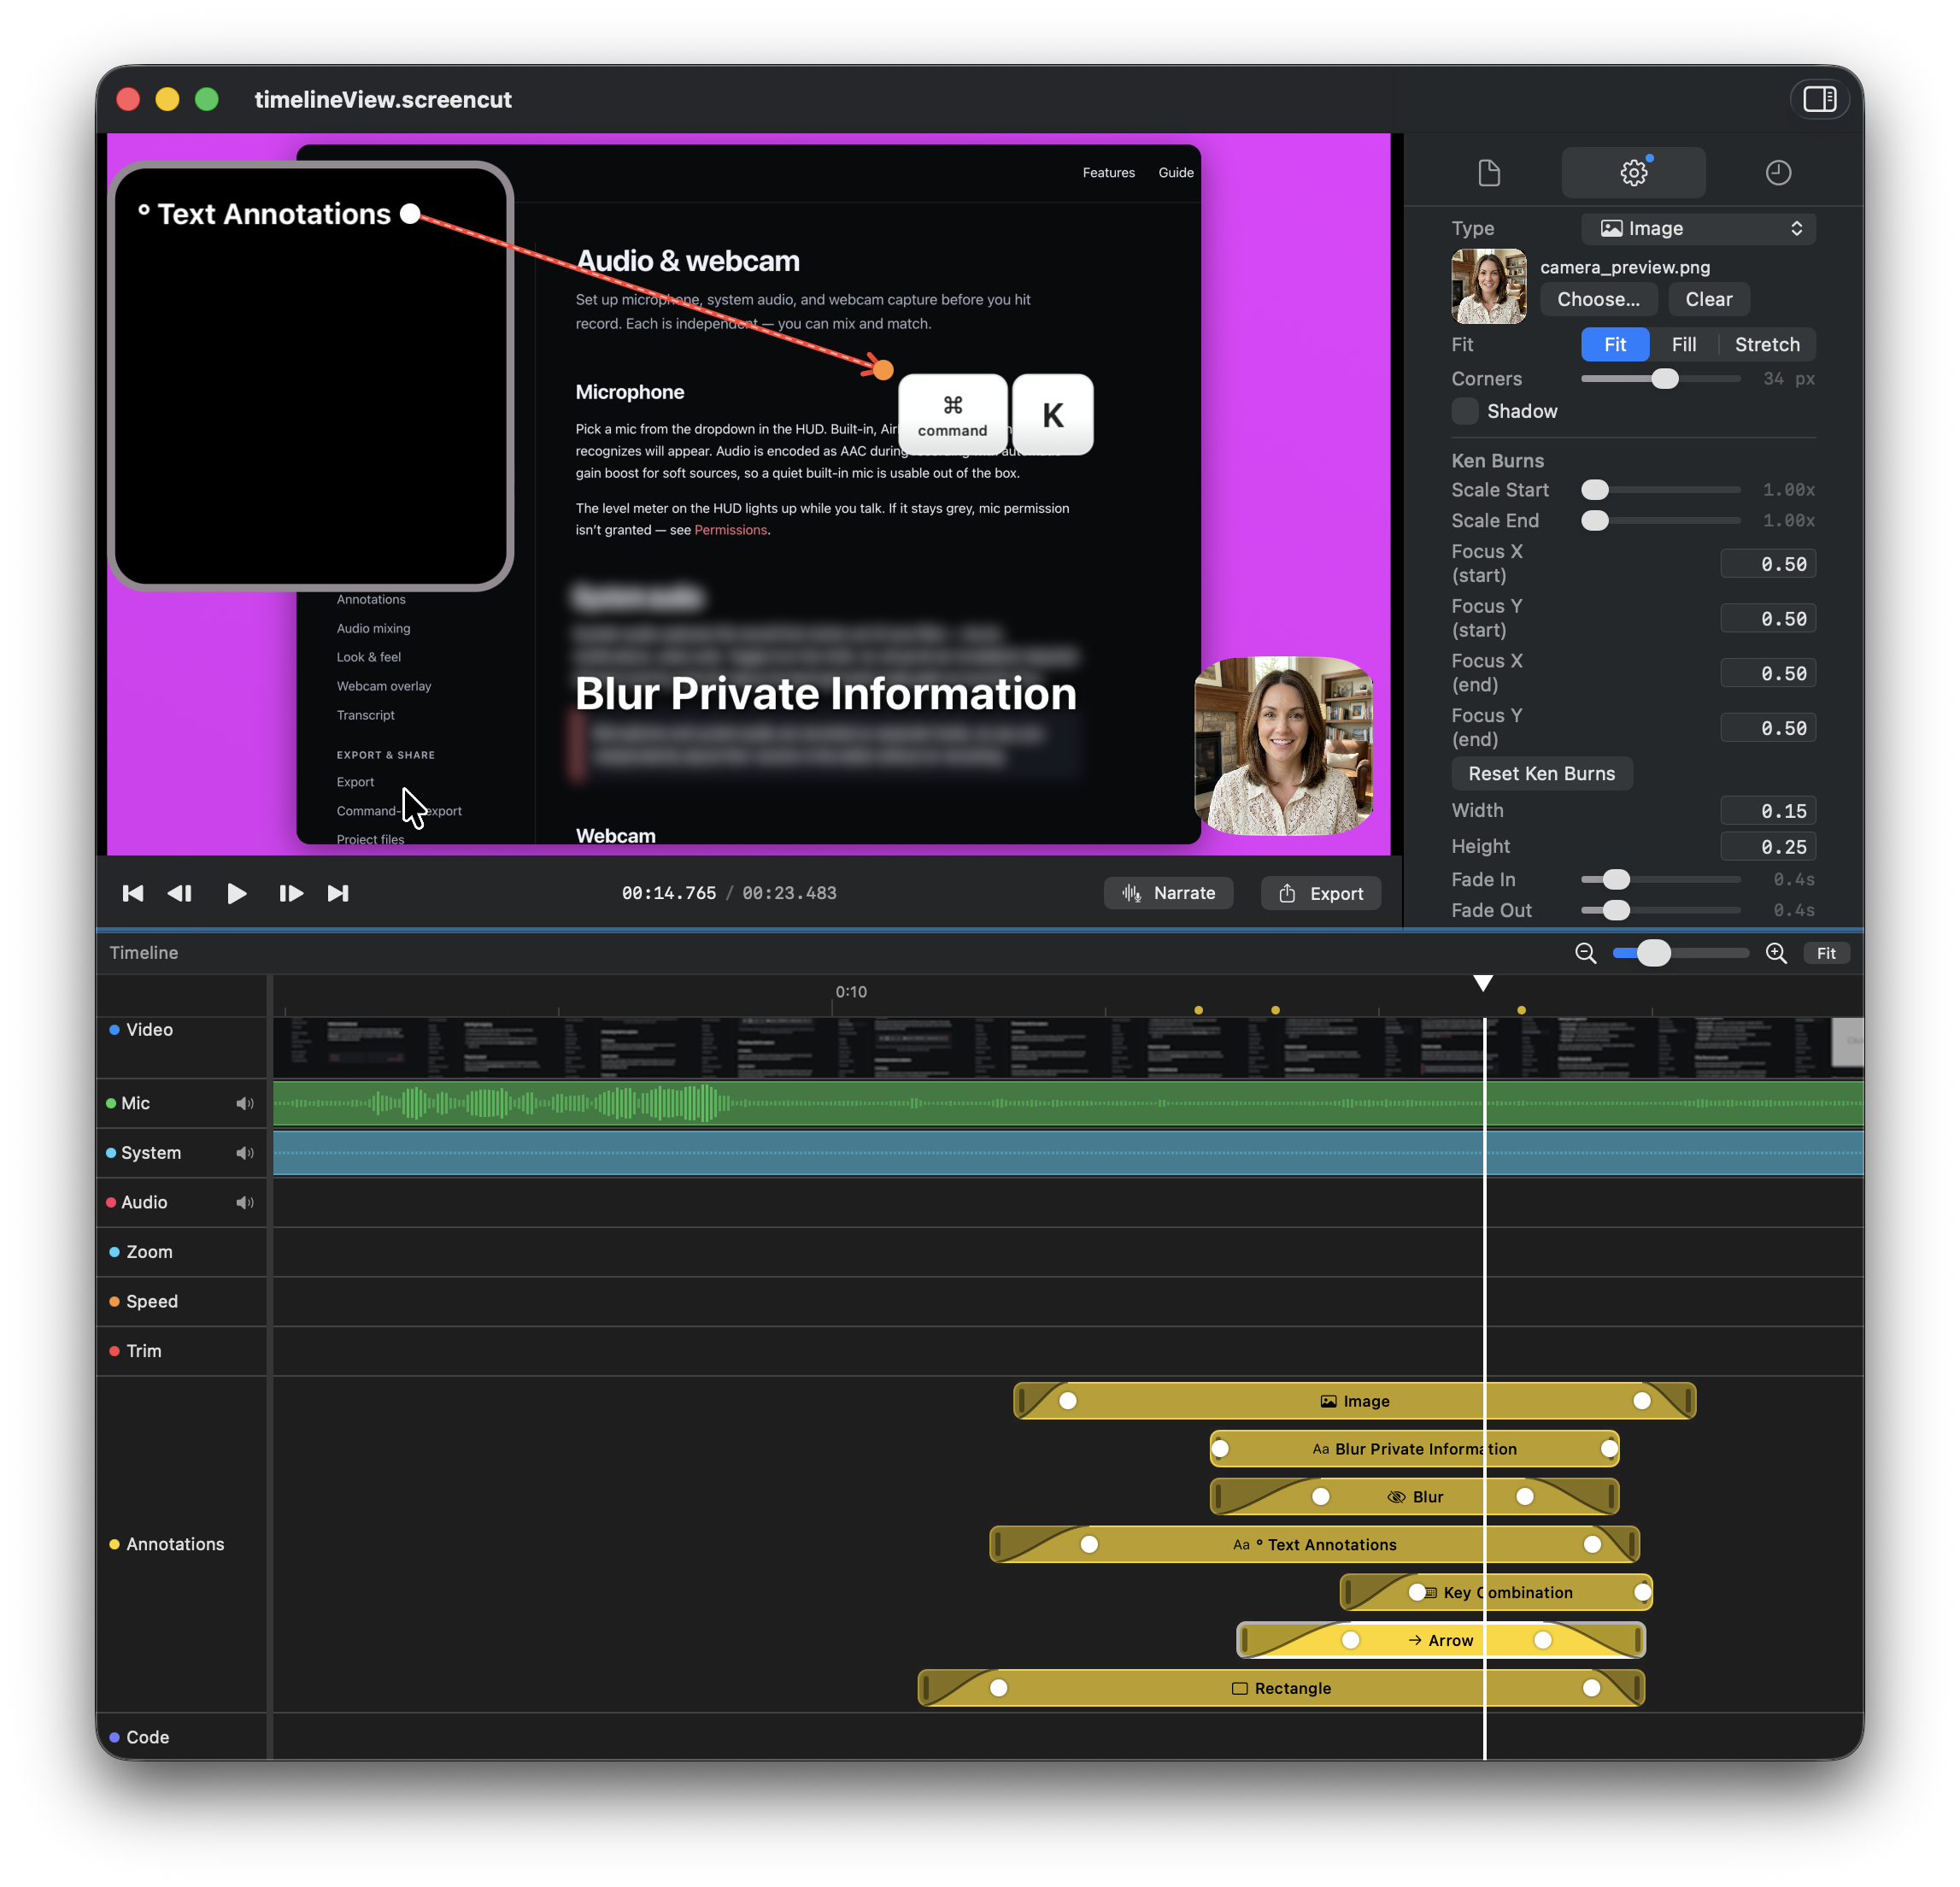
Privacy tip. Always leave blurs on Video. A canvas-parented blur over a sensitive region of the recording will not follow zoom transforms — if you later add a zoom region, the sensitive content can slide out from under the blur and leak into the export.
Adding an annotation
- Right-click empty space on the annotation lane in the timeline. The context menu lists every annotation type (Text, Arrow, Rectangle, Circle, Blur, Spotlight, Highlight, Key Combination, Image); pick one and the new pill lands at the exact click time.
- Double-click empty space on the lane to drop a text annotation at that time (a quick shortcut for the most common type). Empty lanes show a “Double-click in track to add items” hint at the leading edge.
- New annotations default to three seconds, and the inspector switches to the new pill so you can edit it right away.
- Drag in the preview to position; drag the corners to resize. Drag the timeline block’s edges to retime, or drag the inner dots to set fade-in / fade-out.
Annotation types
| Type | What it does |
|---|---|
| Text | Configurable font, size, weight, color, alignment, and optional rounded border. |
| Arrow | Two-point arrow with a head. Drag either endpoint independently. |
| Rectangle | Stroke and fill colors with adjustable corner radius and line width. |
| Circle | Stroke and fill with adjustable line width. |
| Blur | Gaussian blur over an area — for hiding emails, tokens, faces. |
| Spotlight | Dims everything outside the selected area to direct the viewer’s eye. Configurable dim color, optional inner tint, and an adjustable corner radius for a softer focus shape. |
| Highlight | Translucent overlay like a marker pen. |
| Key combination | Renders a shortcut like ⌘+C as a styled cap row. |
| Image | Drop an image into a rect on the canvas (or pinned to the video). Direct-manipulation editor with Fit / Crop to Fill / Ken Burns styles, drag-and-resize crop rect, and 90° rotation. |
Image annotations
Pick an image with Choose…, then choose a style from the inspector's Style picker:
- Fit — the whole image is letterboxed inside the annotation's rect. No cropping, no animation.
- Crop to Fill — pick a region of the image that fills the rect. A dashed crop rect appears over a live preview of the image; drag the rect to pan, drag a corner to zoom. The crop rect always has the same aspect ratio as the annotation, so the selected region maps exactly into the annotation rect with no extra stretching.
- Ken Burns — two crop rects, Start and End. The image animates between them with a smooth zoom + pan over the annotation's duration. Use the arrow button on the toolbar to toggle which keyframe you're editing; the inactive rect stays visible but dimmed.
The toolbar also has rotate-90° CCW and rotate-90° CW buttons, and a Reset button that clears rotation and returns both keyframes to the default centered, unzoomed framing.
Adding the same image annotation by right-clicking the annotation track now lands the new pill at the exact click time instead of the playhead.
Timing & fades
Every annotation has independent start and end times, and optional fade in / fade out durations. By default annotations fade in over 200 ms; the inspector lets you change that or remove the fade entirely.
Z-order & lanes
Multiple annotations can stack. The annotation lane in the timeline shows layers from bottom to top. Drag a block up or down to reorder — useful for making sure a blur doesn’t obscure a label that was supposed to sit above it.
Video-parented annotations sit underneath canvas-parented ones (matching how the video pixels sit underneath the canvas), and within each group the lane order takes effect. The same ordering applies to image annotations and to Copy Current Frame, so what you see in the editor is exactly what lands on the clipboard.
When two annotation rects overlap on the canvas, the one currently selected in the inspector always wins the drag and resize gestures — even if another annotation renders on top of it.
Spotlight
Spotlight dims the area outside a rectangle to pull focus to the region inside. Three knobs in the inspector:
- Dim Color — the color and opacity applied to the dimmed area. Defaults to a 65% black; pick a tint if you want a colored vignette.
- Inner Tint — an optional translucent fill applied inside the spotlight. Defaults to fully transparent so the recording shows through unimpeded.
- Corner Radius — round the spotlight’s edges. 0 = hard corners; max produces a circular focus shape.
The dim is bounded by the annotation’s Parent: a video-parented spotlight only dims the recorded screen (not the wallpaper around it), and a canvas-parented one dims the full canvas.
Key combinations
For tutorials that demonstrate keyboard shortcuts, the key combination annotation renders the keys as styled mac-style caps with the modifier symbols (⌘, ⌥, ⌃, ⇧) in their conventional order. Pick the keys from a popover — they don’t need to be physically pressed.
Tips
- Hold Shift while dragging to constrain to horizontal or vertical motion.
- Hold ⌥ (Option) while resizing a rectangle or circle to scale from the center.
- Use Spotlight + a slow zoom region together for a cinematic emphasis effect.